Friday, July 29, 2011

My! My! Mamey Ice Cream.

I have one particular friend, who will go nameless, but who has a blog titled Adventures of a Radical Fat Bride. The blog is hysterical and I read every entry with great anticipation. However, she recently slammed cilantro and, God forbid, the mango in her blog!  I was going to flag this offense to Google, but weighed my years of friendship with her and thought better of it. Well, I can only imagine what she would do with today's recipe... Mamey Ice Cream. Heathen!

Moving on.... For all of you who do not know what mamey is, it is a luscious tropical fruit shaped like a small brown football... Not appealing you say? Well, never judge a book, or a fruit by its cover!

Mamey comes in a number of varieties, but here in Florida, the two most popular varieties are the Pantin, also known as the Key West Mamey, my personal favorite, and the Magaña. The difference between the two is that the Key West Mamey is smaller and sweeter, while the Magaña is larger, not as sweet, and the flesh is somewhat stringy.

Key West Mamey
One thing to note when selecting a mamey is that you do not cut the fruit open until it is soft to the touch and wrinkly. Also, it takes nearly 18 months for the fruit to ripen on the tree, so you want to make sure that the fruit you purchase is not picked before its time. That means that it must be red inside, bright red. So pick at the skin of the fruit with your nail and see if it's red. If it is, it's a good buy. If it's not, goodbye, move on.

The fact that the fruit is rock hard when you buy it is not a problem. In fact, if the flesh inside is red, the fruit will soften in a few days when it becomes fully ripe. To speed up the ripening process stick the mamey in a brown paper bag and leave on your kitchen counter.

In Miami, there are many places that you can purchase mameys. Any Cuban fruit stand or grocery store carries them. Palacio de los Jugos, in Miami has some of the very best mameys I have found. They have a couple of locations in the South Dade County area and not only do they have mameys, but guavas too... but more on that in a later blog.

Robert is Here a GREAT place in Florida City for Tropical Fruit

You can also find mameys along roadside stands in Homestead and Florida City. One of my very favorite roadside locations in Florida City is Robert is Here. And great news for those outside of Miami! Robert ships anywhere in the US! Go to Robert is Here to order your mameys or other fruit or to learn more about Robert. I've been going to Robert is Here since I was a kid. I love the fruit stand and I love Robert and his family. They are always there to help and are very knowledgeable about tropical fruit. If you have a question on tropical fruit, Robert is your guy. Additionally, if you ever get the chance to visit the fruit stand, be ready for some of the best shakes in Florida. Robert makes a killer mamey shake! But that's just one of the many flavors he has. It's all done with his fruit and all are delicious!

In fact, every time I have someone come down to visit me in South Florida, I try to take them by Robert is Here. Last year, a good friend and former Marine, David, came from Houston to visit. He had never had a mamey shake and was wary of it when I ordered it for myself. But no sooner did he taste mine, that he fell in love with the shake. Since then, David has asked me how he can get his hands on a mamey tree! Unfortunately, mamey trees don't grow well in Houston, but my wily friend is thinking of putting his tree on wheels so he can roll it in before the first frost! And it is because David loves mameys so much that I am dedicating this mamey ice cream recipe to him. Get your hands on that tree David, or call Robert. Here's an ice cream you'll love!

This ice cream is simple and SO delicious! It's creamy and best of all, the way I make it, it's not too fattening!


My My Mamey Ice Cream


3 Cups Mamey Pulp - Get the Key West Mamey for best results. Two small mameys should do it.

1 1/2 Cups Cream - I use the no fat cream from Breakstone, so that reduces any fat from the usual ice creams. If you prefer, you can use half and half.

1/2 Cup Sugar - The mameys I used were so sweet that hardly any sugar was necessary. If you've picked yourself great mameys, you won't have to use much sugar either.


Cut open the mamey. It should be a rich red color.


Using an ice cream scooper, scoop out the meaty flesh of the mamey. The hard part is not eating the sweet meaty  flesh before you make it into ice cream! According to Robert's site, mamey has the consistency of cheesecake, which is true. I love it. 


Winslow couldn't wait for the ice cream. He loves mamey as much as David does and insisted on a piece before all of it was tossed into the blender!


Place three cups of  the fruit which has been scooped out into a blender. Add the sugar and the cream and blend on high. 


Once blended, the mixture will have a thick rich consistency. 


Pour into an ice cream machine and let it churn. It takes about twenty to twenty-five minutes in my machine.


You can see the rich consistency of this ice cream as it churns.


Once done, give Winslow the first taste of the ice cream. 


This is without a doubt one of the most delicious tropical ice creams. If you want to make a shake, you can use the fruit directly with vanilla ice cream in a blender and some milk and sugar to taste. If you want a thick shake, a la Robert, then don't use much milk. I love to eat mamey ice cream, and so does Winslow Dog. For those of you who love tropical fruit, and I don't mean my Radical Fat Bride friend, this is a treat for you! Oh, and by the way, David, I found a great guy who can hook you up with a fruit bearing Key West Mamey tree! I'm planting one myself!

Friday, July 22, 2011

Eat Yer Spinach and Like it! Fruit, Goat Cheese and Spicy Pecan Spinach Salad

Like most kids, I was not into spinach. I tried to feed it to my dog whenever it was served but he would dash away from under the table into another room... traitor...and he would eat anything... well, obviously not. Dead rodent had greater appeal than spinach.

And Popeye didn't convince me either. I used to watch those old cartoons thoroughly sure of the fact that the poor sailor had some serious palette dysfunction whenever he crushed open a can of the leafy green stuff with his hand and wolfed it down like it was appetizing! There was no situation so dire that could possibly make that look good. This was another adult ploy to bamboozle me into eating vegetables.


Neighbor's Plant Could Be
More Tasty

In fact, having spinach was as about as appealing as going over to my next door neighbor's front yard and devouring his funny looking plant. I did not have grasshopper tendencies... so why spinach if not my neighbor's foliage?

But as I got older, I began to see spinach perks. Packed with vitamins and minerals, it was no wonder that Brutus got a beating every time Popeye opened up a can. But could that processed spinach have been as good as a healthy fresh spinach salad for the old boy? Imagine the damage he could have caused with this recipe!

What I like about spinach now is that I find it a fairly flavor neutral springboard for a salad. It does not attack my taste buds in a negative bitter way like arugula. It has a mild flavor to which many wonderful and healthy things can be added.

Fruit, Goat Cheese, and Spicy Pecan Spinach Salad

1 Package organic ready to eat spinach

1/2 cup dried cranberries

1/2 cup golden raisins

1/2 cup toasted Spicy Pecans with Hint of Sweet Orange or store-bought spiced pecans

1/2 cup chopped dried figs

4 Ounces goat cheese


Begin by chopping up the dried figs and the Spicy Pecans with a Hint of Sweet Orange. If you don't have the spicy pecans, you may be able to purchase some at your local grocer, or you can chop up walnuts, pistachios or add smoked almonds. My preference is the Spicy Pecans with a Hint of Sweet Orange because you have a sweet orange flavor, combined with the cloves, nutmeg, cinnamon and sugar and topped off with the smoke and heat of the chipolte peppers. But if you don't have the time to prepare the pecans, the other nuts work very well too!


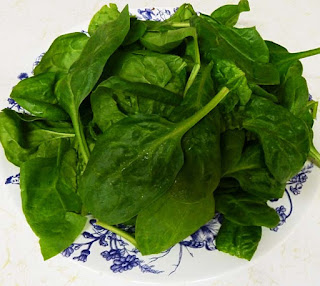
In a large bowl, place the spinach.


Add the cranberries.


Add golden raisins.


Add  the toasted spiced pecans, walnuts, pistachios, or smoked almonds.


Add the chopped dried figs.


Crumble 4 ounces of goat cheese over the salad. For the first time, I recently used Whole Foods Organic Goat Cheese. This is a product of the US. I like the fact that it's organic, but I think for a greater bite in the taste, I would probably choose Ile de France next time. If you don't like goat cheese, you may want to use Parmigiano-Reggiano cheese, which also has a terrific bite and works very well in this salad.


You're ready to serve! And I do think this beats my neighbor's plant....

Tuesday, July 19, 2011

What a Nut! Spicy Pecan Halves with a Hint of Sweet Orange

Trouble in the kitchen... and this time it's not from the dogs... My sister is the person in charge of doing spiced nuts at Thanksgiving, but I hate to wait for the holidays. I like these nuts on salads and in breads... They're not just for Turkey Day any more! So, I thought I'd take matters into my own hands. That's where the problem began...And the trouble isn't coming from my sister, either... It's coming from the original recipe I made. I didn't use hers. I concocted my own. So, what happened? Not enough orange juice in my first batch. I'm pretty certain that insufficient use of OJ in recipes is cause for a criminal action here in the State of Florida, or it should be.

Okay, so what did I learn from this experience? Don't try to replicate your sister's recipe... No, no, that wasn't it. Don't try to improvise? Hopeless. That's what I do best in the kitchen. Well, I think I do best, although this may not be a stellar example. What I learned is that when making spiced nuts, you need enough liquid to coat them with the spices. And not just a tablespoon or two for a couple of cups of nuts. Nooooooo... That's not right no matter who tells you. Some real liquid is needed. Liquid that can reduce and cover the nuts. Sounds basic right? Well, I must have been nuts when I didn't see it coming. My sister's original recipe calls for quite a bit of liquid, and she slow cooks hers in the oven. I'm trying to do this in less time. So, with recipe tweaked... I am now ready to begin!

Ask me to name my favorite nut and certain people will immediately come to mind, but leaving them aside, I would have to say.... and this is a hard one... pecans. I love their soft mellow taste. Alone, as an ingredient, or on food, they are a treat. Naked or spicy, they are enticing.


One of my favorite pecan treats, apart from pralines, is spiced pecans. There are so many recipes for this, that one can get dizzy from choosing among them.

For me, I like my spicy pecans with a hint of orange...Coming from Florida, I suppose that could be expected. But it's all in the combination of spices... cinnamon, clove, nutmeg... with a dash of orange grate and more than a splash of orange juice. Then, the chipolte pepper for a bit of heat and smoke. Ahh... Delicious! The biggest problem is that this also happens to be one of my pooches' favorite goodies. So, things can get nasty around the nut bowl. You too may find yourself jostling for position around the spiced pecans, so you may want to double up on the recipe if you have a nutty crowd.

These spiced pecans are easy to make and call for just a little hard work when it comes to grating the orange rind. You can substitute grated orange rind for dried orange peel, which you will find at the grocery store in the spice section. Although dried orange peel is strong, nothing beats the vibrant flavor of the freshly grated orange rind for this recipe.

Spicy Pecan Halves with a Hint of Sweet Orange

2 C Pecan Halves

2 Tbs butter

4 Tbs dark brown sugar

1/8 Tsp cayenne or ground chipolte chili pepper. If you can find the smokey chipolte ground pepper, that gives it a wonderful kick.

1/2 Tsp cinnamon

1/4 Tsp cloves

1/4 Tsp fresh grated nutmeg

1/4 Tsp freshly grated orange rind of a sweet orange or dried orange peel. If you don't want a strong orange flavor, you can cut this back to about 1/8 of a Tsp.

1/2 C orange juice

To punch up the flavor a bit more, you can also add a tablespoon of Grand Marnier, but that is optional. The liqueur gives it an exquisite flavor.

Grate the rind of a sweet orange, such as a Valencia, Hamlin, or Naval orange, careful to grate only the orange part and not the pith (the bitter white part beneath the orange skin.) You will find that with oranges that are better suited to juicing, such as the Hamlin or Valencia, the skin is rather thin, so be extra careful when grating the skin of those oranges. The Naval orange has a lot thicker skin and is not quite as sweet generally as the other two, but it can still be used in this recipe and it works very well. Set the grated rind aside.

Squeeze out one enough juice from the orange for 1/2 a cup and set that aside. If you feel you need more liquid to coat the nuts later, you can add a bit more orange juice or water.


Place the pecans in a heavy skillet on medium heat and toast until brown for about four minutes. You want to stir them frequently so that they don't burn or toast on just one side. So keep an eye on them.


Add the butter and stir until melted.


Add the spices, including the grated orange rind.


 Add the brown sugar. For easier coating, you may want to grind your sugar in the blender or food processor first. This makes the sugar lighter and it will coat your pecans more easily.


Add the orange juice. Stir and continue to cook until the mixture begins to reduce and thicken. In this photo, you see that more orange juice or water is necessary to help dissolve all the spices and coat the pecans as the sauce cooks and reduces. Adding more liquid also reduces the chance of the pecans burning. To give it time to cook and allow the mixture to thicken, reduce the heat to low. Keep a constant eye on the mixture as this tends to go pretty quickly, especially if you're light on liquid.


Move the pecans to a board covered with parchment paper and spread out the nuts.
Let them cool and harden.

When they're cool, you can eat them, chop them up for salads, spread them as a dessert topping over ice cream and Em's Mom's Hot Fudge Sauce or a butter cream cake, mix them into a banana bread recipe, or take them on the trail. Deliciously addictive

Friday, July 15, 2011

We're Jammin' Till the Break of Dawn... Okay, Not Really, But We're Jammin'

If you read my blog on Mungo's Mango Jam, http://lovetoeat.blog.com/?p=20, then you'll know that I love jams. And I love jams especially during the summer. And it's no small wonder since I put jam on a lot of things and eat it as desert, sometimes with cheese. I love my jams! So, I can see that as the summer progresses, there will be more jam recipes to hit this blog.

Thus far, these last couple of months, I have worked on strawberry, cherry, apricot, raspberry, mango and fig jams...Ahhh fig. Fresh figs from California are in season now and they are bursting with figgy flavor. I love figs so much, that I like to slice them up and eat them plain. Not everybody's cup of tea, or fig, but I think they're wonderful. Winslow doesn't think that they're at their delectable best in the raw. He much prefers them in jam and this fig jam recipe is simply decadent.


In most of my jam recipes, I try to keep everything au naturel. I hate adding things that might affect the flavor of the pure essence of the fruit. I am a purist at heart. But I found when making a simple fig jam from Brown Turkey figs, that it needed something more. While the figs I used were naturally tasty and sweet, when I began to cook them, they seemed to lose some of their flavor. The fig jam is too bland. Enter liquor. The secret to this recipe is Brandy. It melds the flavors into a truly rich treat.
Simply Sloshed Fig Jam

1 1/2 to 2 ounces of brandy (How sloshed you make your Fig Jam and whether it will need a designated driver to get to your table is entirely up to you, but I found that this amount gives it a rich flavor without destroying the essence of the fig.)

1 1/2 pounds Brown Turkey Figs

1/4 cup sugar

Wash, stem, and slice the figs. Place them in a sauce pan and add the sugar. Set the heat to medium high. Begin stirring. This is another one of those recipes where carpel tunnel syndrome may set in before the jam is ready to eat from the amount of stirring that goes on.
Fig Jam in the Making

As the fruit warms up, the figs will begin to disintegrate. Continue stirring, and stirring, and stirring. When the fig mush begins to boil, reduce the heat to a high low. You want it to continue to cook and simmer. Continue stirring. As you stir this concoction, you may find that some pieces do not break up very easily. A potato masher is a handy tool in this case. Alternatively, you may want to put the mix into a food processor or blender. Be careful when you transfer the mashed fruit to a blender or food processor as it will be very hot. Continue to stir until the consistency of the mix is thick and brown, about 45 minutes to an hour total time. Taste it for sweetness. If it is to your liking, you're ready to add the brandy. Stir in the brandy and cook for a minute or two longer. Remove from the stove-top and let it cool. Once the jam has cooled off, transfer it to properly prepared Mason jars. Since this jam is not "canned", store it in the refrigerator and consume it within a week to avoid spoilage. 

A lovely way to serve this jam is over vanilla ice cream or with crackers over goat cheese. Just don't leave the plate of cheese and jam out where dogs might reach it. I know from experience how this delicacy can disappear in the time that it takes for me to turn my back. Not funny when you see your dog licking his chops and guests are about to arrive!

Tuesday, July 12, 2011

If Life Gives You Lemons... Make Frozen Lemon Yogurt


Many people think that we don't have seasons in South Florida. That's just not true. We have three whole seasons: hot, hotter, and hotter than Hell. And they translate to this: winter is hot, spring and fall are hotter, and summer is hotter than Hell. All that notwithstanding, the water in my pool, for some reason unknown to science or common sense, will NOT heat up until the middle of hotter than Hell, and cools down before the Hotter Equinox arrives in mid-September. For that reason, swimming is kept down to a minimum around here... And yes, I know a number of you in colder climates are laughing and thinking that we're wuses... which we are. But, live here for a couple of years like some of my Northeastern transplant friends and you too will not get into the pool or the ocean unless it feels like bathwater.

Winslow Cools off on His Rubber Raft
Winslow Dog, originally from New Jersey, is such a permanent snow bird. He gets very excited when summer rolls around and he can finally use the pool. But he does not believe that the water is warm enough, even in the middle of hotter than Hell, and so he likes to go by raft. His summer holiday consists of me getting into the water and pushing him around his rubber raft for hours... Fun for him, not so much for me. He loves the splash of the water and how it cools him down.
A better solution for those humid hot days is to make some frozen lemon yogurt. It's easy, and the lightness of the chilled treat along with the citric kick is perfect for this time of year....Well, perfect for us down here year round.

This is a simple recipe, that requires a little effort when grating the lemon rind. But for anyone who has been following this blog, you should be getting quite adept at constantly grating some kind of rind, whether it's key lime, orange, or lemon.

First a word on acidity. One of my favorite writers and pastry chefs is David Lebovitz, who has an enormously funny book called The Sweet Life in Paris, part cookbook, part travelogue and totally engrossing and funny. Mr. Lebovitz suggests in an article appearing in the LA Times, that to get the tangy tartness found in commercial brand frozen yogurts, one use citric acid. I think that is a phenomenal idea, but not when it comes to frozen lemon yogurt. The acidity of the lemon juice is sufficient to give the yogurt that kick and any more would put it over the top. In fact, I use far less lemon juice in my recipe than I have seen in many others. I am from Florida. I love citrus, but I don't want anything too sour. For those that like SUPER tangy, I make some recommendations below. But taste the blend as you add the lemon juice or the citric acid to make sure you don't get past the point of no return.

Miami Lemon Frozen Yogurt

2 C Organic Valley Live Lowfat Organic Yogurt (If you've been reading my blog, you know I'm a big fan of this stuff and the great thing is that unlike other frozen yogurt recipes, this yogurt does not have to be strained!)

Grated rind of one Meyer Lemon

1/2 C sugar, ground

1 Tbsp lemon juice

2 tsps vanilla extract

Citric Acid to taste (optional)


Begin by grating your lemon, careful not to eat into the pith, which is the bitter white part of the lemon. Set the grated lemon rind aside.

Squeeze 1 tbls of juice and set aside. For me, a tablespoon is enough to give the frozen yogurt a tangy taste. However, some people like it more acidic. I personally would not add more than 1/4 cup of lemon juice to 2 cups of yogurt for this frozen treat. Otherwise, it can be downright sour. 

In a blender pour in 1/2 cup of sugar and grind it.

After grinding, the sugar will be finer than in its course form and the grinding will make it easier to incorporate the sugar into the yogurt mix.

 Pour 2 cups of the Organic Valley Live Lowfat Yogurt into the blender.

Add the sugar, grated lemon rind, lemon juice, and vanilla extract and blend. Taste. If you find you like a tangier mix, you can add citric acid - but do this sparingly and very slowly to make sure it's not overdone. In the alternative, you can squeeze more lemon juice as well if you want a sharper taste. Since I do firmly believe that cooking is in great part an art form, you may want to modify the recipe to suit your particular style. If you like it sweeter, you can increase the sugar. For a stronger taste of vanilla, you can add more extract, or use vanilla paste. I have a friend who makes a fantastic vanilla ice cream by adding a healthy portion of vanilla paste.

Stick the blender in the fridge and let it chill for about 45 minutes. Go into your garden. Talk to the roving gnome. Explain your citric acid dilemma. Get his advice. Or if you're more pragmatic, skip the roving gnome, don't ask for any further opinions, and get your ice cream maker ready for the next step.

When the mixture has had time to chill, pour the mixture into the ice cream maker and churn. On mine, it's usually done in about twenty to thirty minutes.

While you're waiting for that, go back outside and hang with the dog. This is Julian, my mother's dog. He is a mutt that had been abandoned on a street near where I live. I met him while I was running one day, certain that this unknown canine would make breakfast out of my leg. He didn't. I was so grateful that I began feeding him. We quickly became friends and one day he followed me home. Since I already had two dogs, my mother decided to keep him. He is a VERY big fan of the frozen lemon yogurt and as you can see from the smile on his face, he knows what's in the ice cream maker.

When the frozen yogurt is done, scoop it out and transfer it to a container or serve. I love to add strawberry jam as a topping. I love the juxtaposition of the sweetness of the jam with the tartness of the frozen lemon yogurt. Julian, you want to know? He likes his plain. He may not go on the raft with Winslow, but he cools off with a hearty helping of Miami Frozen Lemon Yogurt!

Friday, July 8, 2011

Going Bananas! A Delicious Sweet South Florida Side Dish

Living in Florida, I am picky about the ripeness and sweetness of bananas. We have a variety here, and I am not particular to very sweet or soft bananas. This is part of the reason I don't go for the Manzano, the short stubby little banana, which in a bunch looks like a baby's chubby hand and fingers. I like the old standby banana: the Cavendish. This is the banana we all loving call the "Chaquita" banana. It's the most popular banana in the US. I also like Plaintains cooked or fried, but that's another article for this blog.

Back to the Cavendish banana. When I used to run, before I busted up my knee, I ate a Cavendish banana about thirty minutes before I hit the road. I found it gave me a lot of energy and bananas I've since learned are packed with electrolytes. However, I like my bananas on the green side. No mushy, overly sweet bananas. Give me a firm and not too sweet Cavendish any time. So, sometimes, when I buy a bunch of bananas at my grocery store and keep them in my kitchen for a few days, I find that in our South Florida heat, especially in the summer, they ripen up very fast. I hate to lose food, so I have to do something with these "too ripe" bananas.

Enter my mother's sweet banana recipe. While I don't like sweet uncooked bananas, I adore sweet cooked ones. She makes these little suckers in sherry, sugar, butter, and cinnamon for a delectable treat! They make an excellent side dish for pork, chicken, and pasta and are rumored to be one of Prince Charles' favorites.

Sweet Stovetop Bananas

1 Tbs Butter

4 Medium size Cavendish Bananas, peeled. (They do not have to be overly ripe, but they can be.)

1/4 C Sherry

2 Tbs Sugar

Cinnamon to taste

Melt Butter in a Shallow Saucepan
Begin by melting the butter on low heat in a saucepan. Once the butter is melted add your peeled bananas to the pan. This reminds me of sautéing, except sautéing is done at high heat quickly. The idea here is to brown the bananas slowly, at low heat, so they can absorb the flavors.

Add Your Bananas to the Pan


Let the bananas cook and brown. They will begin to release liquid. It can take about five to ten minutes for them to begin to brown. You want to turn them over from time to time so that they brown evenly on both sides.


Add Sugar, Sherry and Cinnamon
When your bananas have browned add the sherry, sugar, and cinnamon. Let them continue to cook for about twenty to thirty minutes and keep turning them over as they cook.

The bananas will shrink in size and continue to release juices. They will slowly absorb the flavors of the sugar, cinnamon, and sherry. The key here is patience.


A Thick Sweet Sauce is Formed
When the bananas are tender to the fork and the sauce around them has reduced and thickened, you are ready to remove the bananas from the flame.

Move them to a dish and serve them right away. These are easy to do and a great last minute side dish when in a pinch.